Halloween Village Made with Clay: Spooky and Delightful!
By using air-dry clay, paint, and a template to create your own Halloween village out of air-dry clay, you can make an impressive display in any room of your house!
What We Love
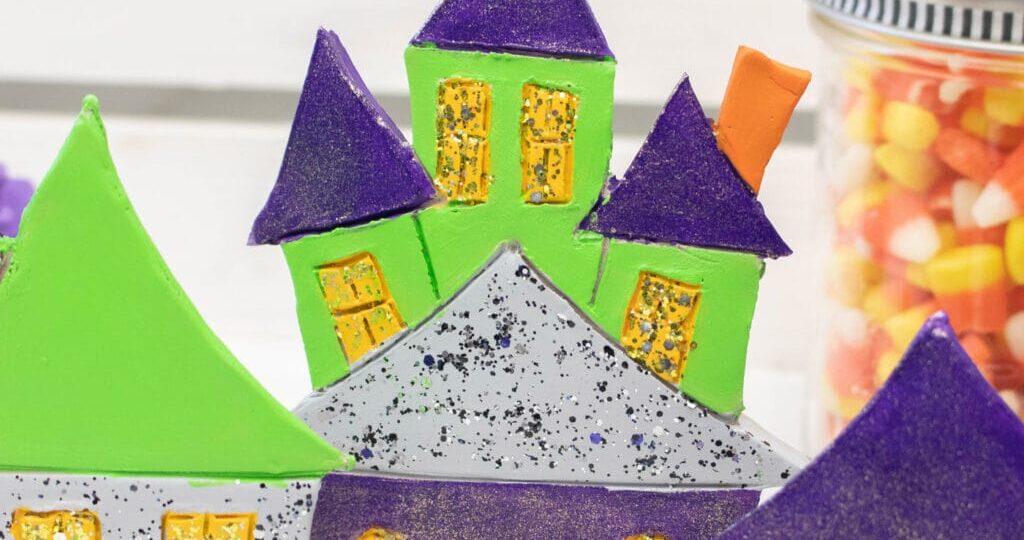
This clay Halloween village is anything but frightening; in fact, painting them with iconic holiday hues such as orange, green and purple makes this project that much more enjoyable! Of course you could choose any color you’d like for the houses themselves as well as adding extra features like stripes or painted bats for an eerie and mysterious vibe!
How cute would one of these houses look inside an elaborate Halloween terrarium like we made last year? Kids of all ages could easily join in this project for maximum craft day fun.
Get all the supplies and directions in an easily printable format at the end of this post.
How to Build a Clay Halloween Village
Download and print out house templates before cutting them out using scissors as guides when making air-dry clay houses.
Remove enough air-dry clay (about 1/3 of the package). Knead to soften, and roll out a disc that measures 1/4″ thick using a rolling tool. Next, lay one of your house templates over this disc, cutting out its shape using a sharp utility knife.
Add details to the houses using your forming tools and templates as guides, using water and your hands as needed to smooth any rough edges or wrinkles in the clay. umplut Add a small rectangular base so each house will stand on its own once dried.
Set the houses aside for 24 to 48 hours to dry, periodically turning them to avoid curling. Paint inside each window with yellow.
Expert Crafting Tips: Allow paint to fully dry between coats and changes of colors, so it can dry fully after each change of coats or color changes. Paint parts of the houses purple as shown; orange is suitable for two of the doors/chimneys/roofs on two of them (as illustrated).
Paint should always be completely dry between coats and changes of colors. For an eerie effect, consider painting houses black or dark grey with yellow windows for Halloween village, adding yellow windows as windows or even adding silver metallic or glitter roofs as roofs against black houses.
Paint some pumpkins, skeletons and bats onto the houses when displaying them or add decorative stickers throughout. Additionally, place black or white faux spiderwebs all around them when showing them off.
When using your forming tools to add details to houses, trace a design (bat, skeleton or pumpkin) so it can easily be painted later.
Prop up your clay Halloween village on a mantelpiece, bookshelf or window sill for display. To add an extra festive touch, place twinkle lights around its base or behind it – this will help illuminate it further! Happy Halloween!