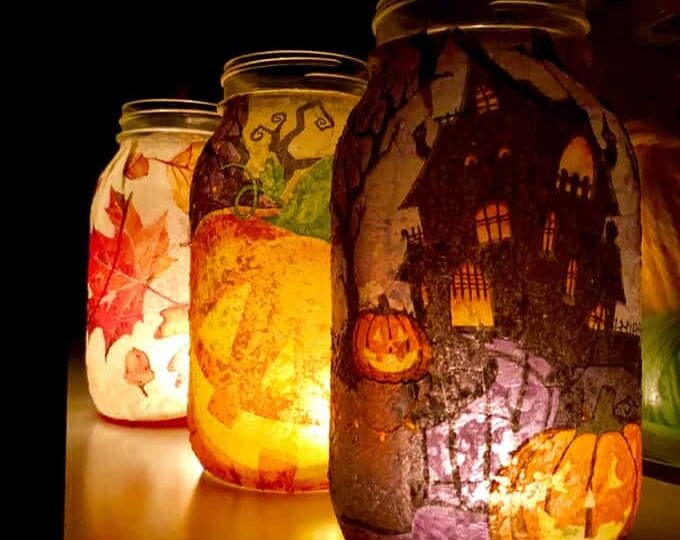
Captivating Fall Luminaries: DIY Napkin Craft
I love luminaries and have created many different kinds over time. These fall napkin luminaries use festive Halloween paper napkins that you can find at dollar stores, big box stores and grocery stores to create these fall themed luminaries.
How to Create Fall Napkin Luminaries Looking for an easy, fun project for girl’s night, senior projects or simply something unique and festive for fall decoration? Look no further – Halloween and fall napkin luminaries make great additions!
Recently I held a Facebook live session to demonstrate this project; if you prefer the shorter version instead, this blog post provides the edited video tutorial.
Mod Podge Tips
Before diving in and starting work on any mod podge project, it is advisable to read over these tips first if you didn’t watch my detailed video tutorial on mod podgeing:
Do not mix white glue with water – while this solution does work, over time it can turn yellow over time. Mod Podge (and similar decoupage mediums) has been specially formulated to prevent this. Check out our post How To Select The Proper Glue For Craft Projects for more tips!
Do “prime” your jar by applying a thin coat of Mod Podge to create a tacky surface, making application of napkins much simpler. If possible, separate double-ply napkins; I used sturdy one-ply ones in this tutorial.
Apply Mod Podge carefully and lightly over the napkin in order to avoid ripping it. Remember that decoupage medium is liquid, while napkins are delicate – using too heavy a hand may damage your design! When applying Mod Podge use enough that dripping doesn’t occur.
Before adding candles and displaying, allow your project to fully dry (preferably overnight). When not in use, store Mod Podge in an airtight container in a cool location away from reach of children.
Place wet decoupage projects onto a wire cooling rack to keep them from sticking to your table! Doing this also keeps them from oversaturating with moisture and becoming unusable later.
How to make Halloween and fall napkin luminaries
Start by washing and drying a glass jar. Prepare paper napkins by separating plies if necessary, cutting designs out, applying a thin coat of Mod Podge on the front surface, then turning over with its wet side facing up for placement on an angle.
Apply Mod Podge to the bottom, side edges and rim before gently applying one coat over the entire napkin using your gentlest hand. Repeat steps on the opposite side.
Allow everything to dry completely (overnight is best), before displaying and adding the candle. For an optional step of decoration on the rim with burlap ribbon or twine. Watch our video in this post for assistance in this project!
Crafting Ideas For Fall and Halloween
Here are more fall and Halloween craft projects we have handpicked just for you! This blog contains many more fall/Halloween craft projects; but here are a few we chose specifically!