Create a Stunning Sea Glass Christmas Tree
Hello friends! Are you ready for some beachy fun this holiday season? Make this DIY sea glass Christmas tree and display your stunning sea glass collection every year during this holiday season.
At our cottage, one of our favorite activities with the kids is collecting sea glass – technically called beach glass since we’re at a lake (rather than the ocean), but over time we have become accustomed to using “sea glass.” Each child brings along a small baggie filled with their finds so they can sort by color when we return home – hours can easily pass this way as we search the shores for treasures!
As part of our DIY tutorial series for driftwood crafts – such as our driftwood crab wall art, concrete and driftwood sailboat decor, driftwood reindeer ornaments, and large driftwood Christmas tree – we were eager to present this easy sea glass craft as something different. If you don’t already own enough sea glass in your collection, purchasing some from your local nursery or craft store might also work!
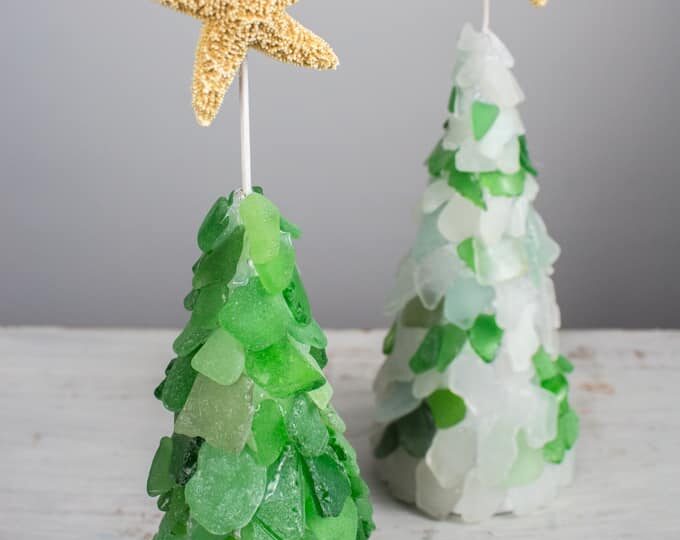
These sea glass Christmas trees are absolutely adorable. From their adorable starfish toppers to all of their natural glass pieces, we love how these trees turned out! For other ways you could use your sea glass collection, consider making macrame seaglass necklaces, planters, or simply scattering it loosely within a beach-inspired terrarium.
Assemble Your Cones
Begin By Poking Holes In Each Cone: Use a sharp-pointed tool such as an awl or wooden skewer to poke a hole through each cone’s top using sharp, pointed objects – toothpicks are typically not strong enough to puncture through paper mache walls!
To adjust the size of cones so trees are at different heights, simply cut some height off at the base. Wrap scotch tape about 3/4″ from its base before using a utility knife or scissors to cut along this taped edge to reduce height before taking another approach. Remove tape before moving on.
Next, use white acrylic paint to cover both cones and toothpicks with white acrylic paint, leaving plenty of time for drying time before proceeding to step 2.
Preparing Your Star Topper:
Turn the starfish embellishments over with their back sides facing up. Dab some glue to the backside of each starfish embellishment and place one of the painted toothpicks down so one end droops over. Hold this toothpick until the glue sets; set aside temporarily.
Applying Sea Glass:: When working with actual sea glass collected from beaches, be sure to wash and dry it prior to gluing it together. Preheat a hot glue gun, as the adhesive sets quickly if you use this method; but work carefully so as not to risk injury from its heat.
As with the previous Christmas trees, our first one consisted solely of green glass. Starting at the base of the cone, apply a dab of glue as shown and press one piece of sea glass on top – not exceeding beyond the base of the cone! Continue around its edge glueing pieces of glass together as you go until all glass pieces have been added to its rim.
In the second row, overlap the bottom edge of each piece with one of the sea glass from the previous row.
Continue laying one sea glass at a time and one row at a time.
Make your way up the cone using different sizes and colors of cones to reach its pinnacle.
At the top, be mindful to avoid filling in the hole you created earlier with glue or glass.
For our second Christmas tree, we used an assortment of white, green and blue glass sea glass; however, you are free to create any combination that suits you!
Once your glue has fully set, remove any loose strands. Finally, place each tree’s star at the top by inserting an end of a toothpick into its hole at the top of its cone.
How would you prefer to display your sea glass collection?
Crafting Wood Slice Trees using foam cones and rustic wood slices is another fantastic Christmas tree-related craft we think you’d enjoy making! They make for a fast and fun activity!
For those of you living in coastal themed homes, this Coastal Branch Tree for Christmas would make the ideal addition to your beach-inspired holiday decor!